
Valentine's Day Candy Bouquet
- Feb 6, 2017
- 3 min read

In the spirit of Valentine's Day approaching, I thought we'd start off with a project that's definitely on the sweet side!
Today I will be showing you how to make a bouquet to give to your special someone. You can make these with various types of candy or even have a theme to your bouquet if you wish. You can get creative as you want with this or leave it simple, it's completely up to you!
Supply List for Candy Box Bouquet:
- 4 boxes of candy ( Can be same candy or different, but has to be same sized boxes)
- A block of stryofoam or floral foam. Big enough to put in between boxes. (Found in Floral or craft section)
- Your choices of tissue paper
- 16 pack of Wood Dowels
- Glue gun
- Scissors
- Various pieces of candy. Can be any kind. Make sure they're individually wrapped.
- A piece of cardboard
Optional:
- Ribbon and other decorations of your choice.
- An awl (Found in sewing or craft section)

1. Line up boxes together to form a rectangle. Make sure all the boxes are pointed the same way or it will look funny.

2. Take the glue gun and put a line of glue down the side of the box and connect it to the other box that was lined up next to it.

3. Work your way around gluing them and making sure to keep them in the rectangle form you started earlier so you know where to put the glue.

4. Next take your piece of cardboard and lay it on top of your candy box vase. Cut it so that it covers the bottom of the candy box vase without going over the edges. You don't want to see it poking out from the bottom of your vase.

5. Once you have your piece of cardboard cut out and ready, take your glue gun and add glue to all four sides, then attach your cardboard piece to the bottom. This will serve as stability for your vase and keeps everything inside your vase.


6. Next cut out your piece of Styrofoam to watch the height and width or your vase. You do not want the Styrofoam poking out from the top. You want it slightly below the vase line.


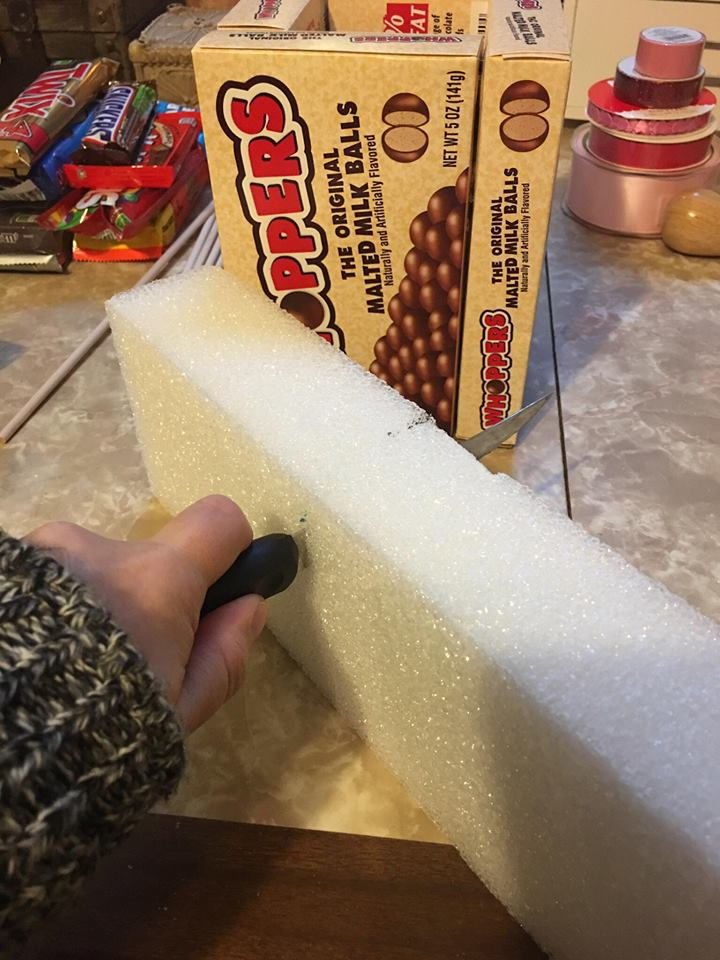
7. Also it's good to have some space in between the vase and Styrofoam. This is to add in the tissue paper in the next step.

8. Once you have your Styrofoam to the correct dimensions, get your tissue paper ready. You want to have 2 sheets of tissue paper for each side. You can place them any way you desire. This part is totally up to you. I folded mine together roughly so that one color was poking out over another and shoved them into the cracks. Using a blunt stick or object to push the paper in is recommended, but be careful while doing so as you can rip your paper.


9. When you have the tissue paper in place, fluff out the ends a bit.

10. Now onto the fun part, the candy! Take a wood dowel and a piece of a candy of your choice. You want the stick to be at least half way up on the back of the candy bar so that it stays secure on the dowel. Add hot glue to your stick after you've measured and then quickly place your candy firmly onto the stick. Press down slightly for a minute to form a good bond. Don't crush your candy though!


11. Next, take an awl and poke holes in your Styrofoam to help get the sticks in place. This step is optional. It depends on how tough the Styrofoam is that you get. Some types won't give you any problems putting the sticks in.


12. Repeat steps 10 and 11 until you get the amount of candy that you want for your bouquet.

13. Next add in any decorations into your bouquet. I found these cute glittery foam hearts to give it some flare.

Your bouquet is now done! If you wish to keep it simple you can leave it like this or if you wish to get more creative with your bouquet, add in some ribbon, washi tape, buttons, etc to make it unique for your special someone!


Do what you love. DO IT YOURSELF!


Comments